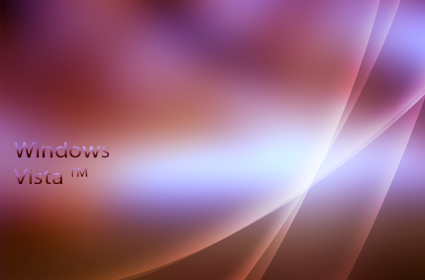
In this tutorial, I’ll tell you how to create an amazing Vista theme background in just a few easy steps. I’m using Photoshop CS4 and you’ll see how much fun it is to make something like this:
So let’s get started.
Step 1First of all, open any image you have. It’s preferable to be a big image so it would be clear and nice if you set it as your background. It also should have many light and dark parts for better effect.
Duplicate your image as shown below and blur it to about 40%-50%.
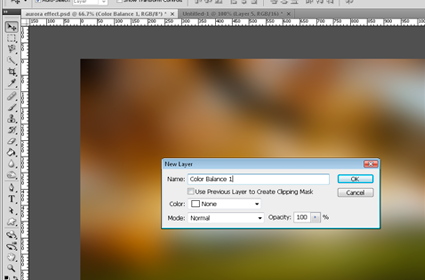
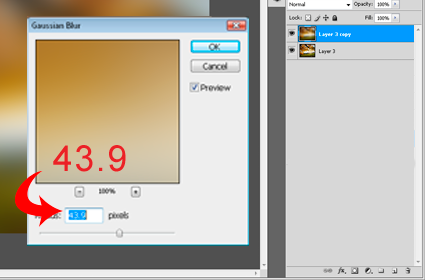 Step 2
The next thing we’ll do is add a Color Balance layer. Go to Layer > New Adjustment Layer and click on Color Balance. Click OK.
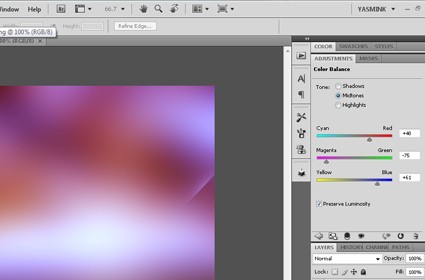
 Step 3
Now, adjust the color as you wish. Here are the values I used below:
 Step 4
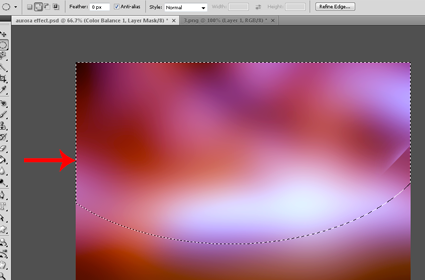
With the oval tool, make a big selection like shown below. We’ll use this to create the shiny lines.
 Step 5
Select a soft white brush and make it really big about 200px-300px. And slowly, start going over the selection to make a very thin line.
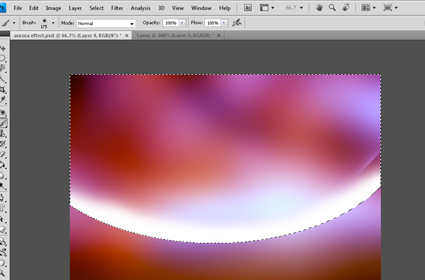
If the brush stroke becomes too big like I did above, use the eraser tool again with a soft brush and start refining the brush stroke.
 Step 6
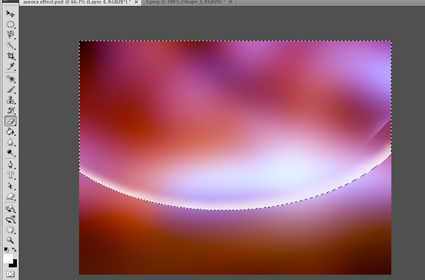
Press Ctrl+D, to deselect the selection and select either Overlay or Soft Light as the layer mode depending on which will look better in your case. Here, I used Soft Light because it looks better and blends with the background. Now you’ll have a very nice shiny line effect as seen below.
 Step 7
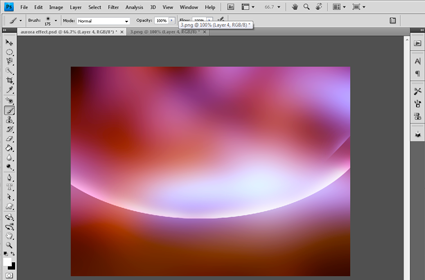
We’re almost done. Press Ctrl+T to transform it and make it vertical. Then all you got to do is duplicate them, transform them, and place them all together like I’ve done below.
 Step 8
I’ll show a really cool trick. Go to the Text tool and choose the Horizontal Type Mask Tool. Type and type any text you want and set the font type, size and all the attributes and then click Enter.
Once you do that, your text will turn into a selection. So select the bottom layer and click Ctrl+J. Now a new layer is created above the background and below the Color Balance Layer.
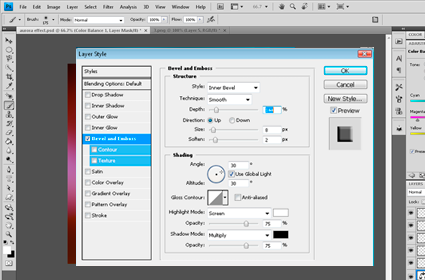
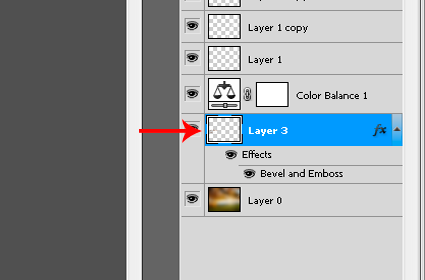 Step 9
Apply a Bevel and Emboss Effect similar to the values below:
 Step 10
Now your text appears on the screen.
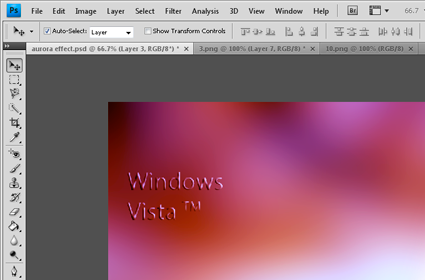
The cool thing is that whenever you change the background color, the text color with change according as well.
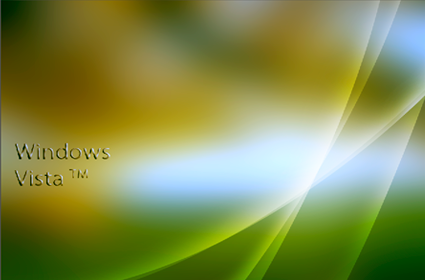 Result